
Deploy React App with DeployHQ
DeployHQ makes deploying React applications straightforward by automating your build pipeline and pushing the compiled output to your servers whenever you push to your repository. Rather than manually running builds and transferring files, DeployHQ watches your repository, runs npm run build, and deploys the generated dist folder — keeping your deployments consistent and repeatable.
This guide walks through setting up a complete deployment pipeline for a React application built with Vite, from creating your project in DeployHQ to configuring your web server for single-page application routing.
Deploying with DeployHQ
Create a project
Start by creating a new project in DeployHQ and connecting it to your repository. DeployHQ supports GitHub, GitLab, Bitbucket, and any self-hosted Git repository.
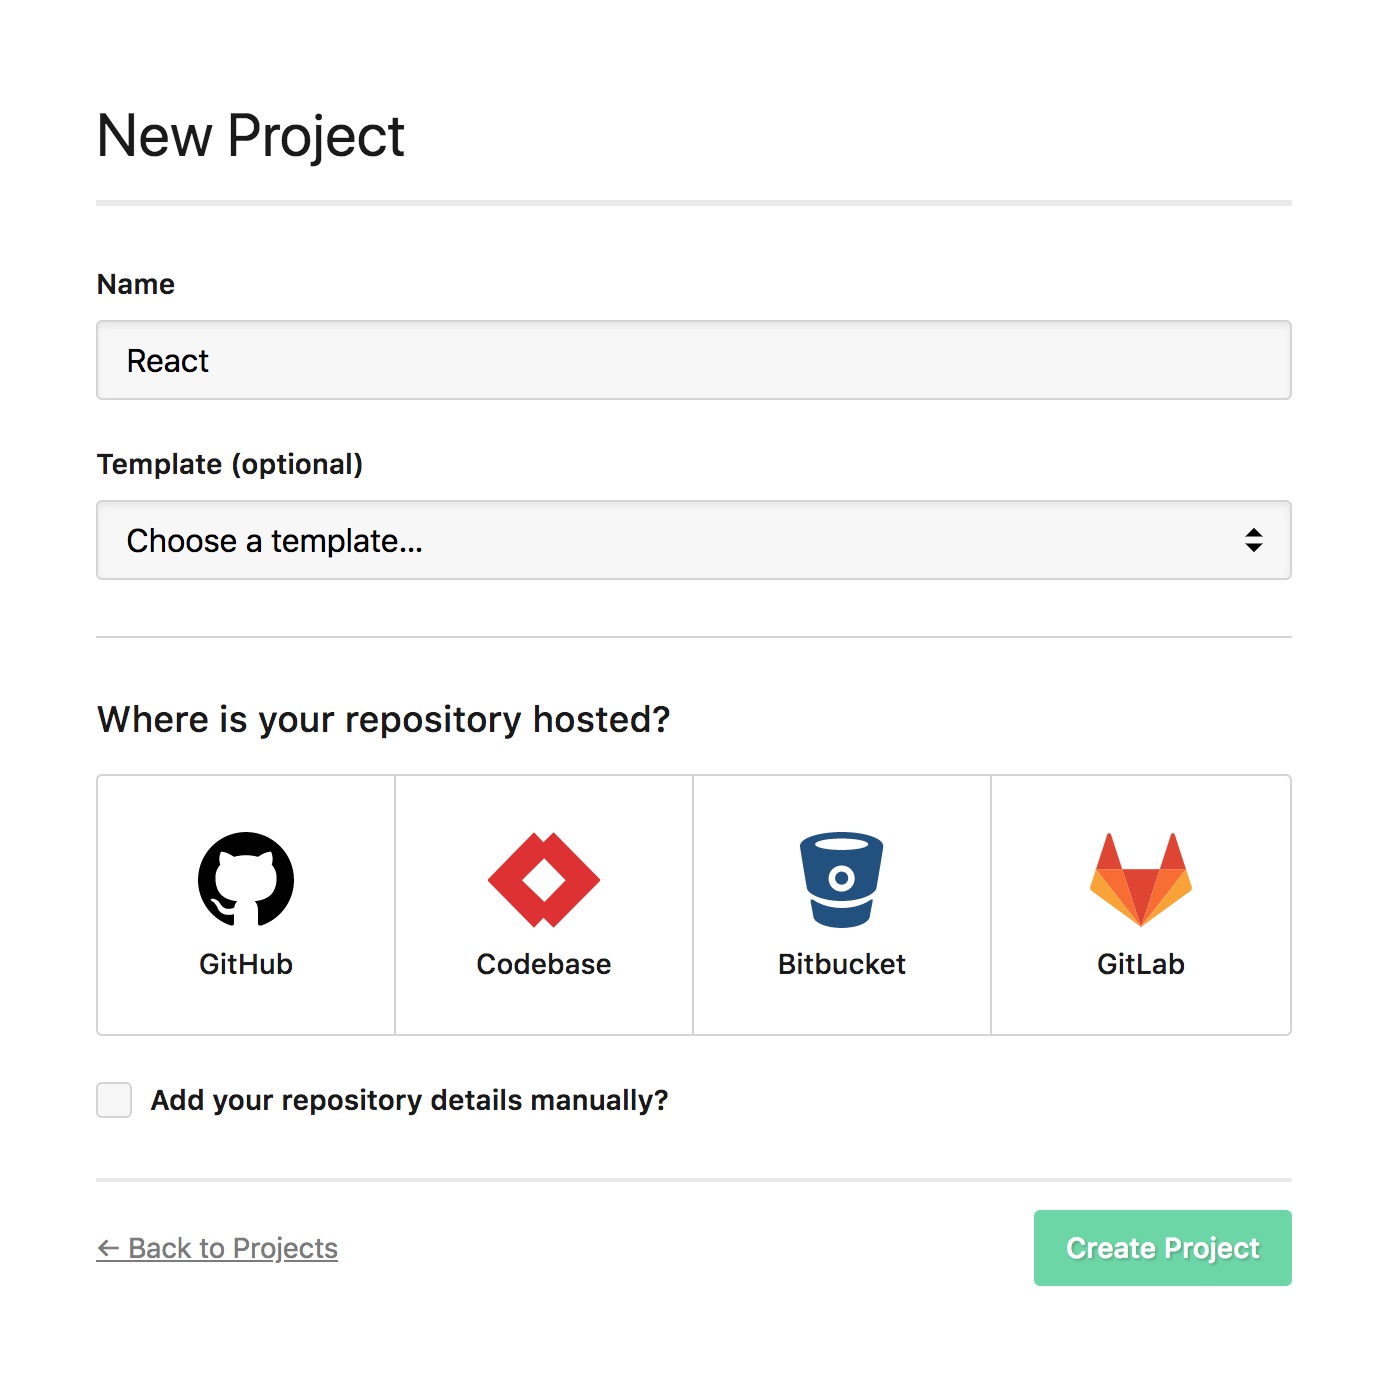
If you need help connecting your repository, see (Article: #7). Once connected, DeployHQ will detect your repository branches and allow you to set up deployments from any branch.
For more detail on project creation, see our support page.
Create a deployment user
For SSH deployments, it is good practice to create a dedicated system user on your server rather than deploying as your personal account or root. This limits the blast radius if credentials are ever compromised and makes it easier to audit deployment activity.
On your server, create a dedicated user:
sudo adduser deployhq
sudo mkdir -p /home/deployhq/.ssh
sudo touch /home/deployhq/.ssh/authorized_keys
sudo chmod 700 /home/deployhq/.ssh
sudo chmod 600 /home/deployhq/.ssh/authorized_keys
Give this user ownership of your web root directory (adjust the path to match your setup):
sudo chown -R deployhq:deployhq /var/www/your-react-app
DeployHQ will generate an SSH public key for your project, which you will add to this user's authorized_keys file when configuring the server connection below.
Configure a server
Add a server to your project by navigating to Servers and clicking New Server. Choose SSH/SFTP as the connection type for most deployments — this gives you the most control and supports zero-downtime deployments.
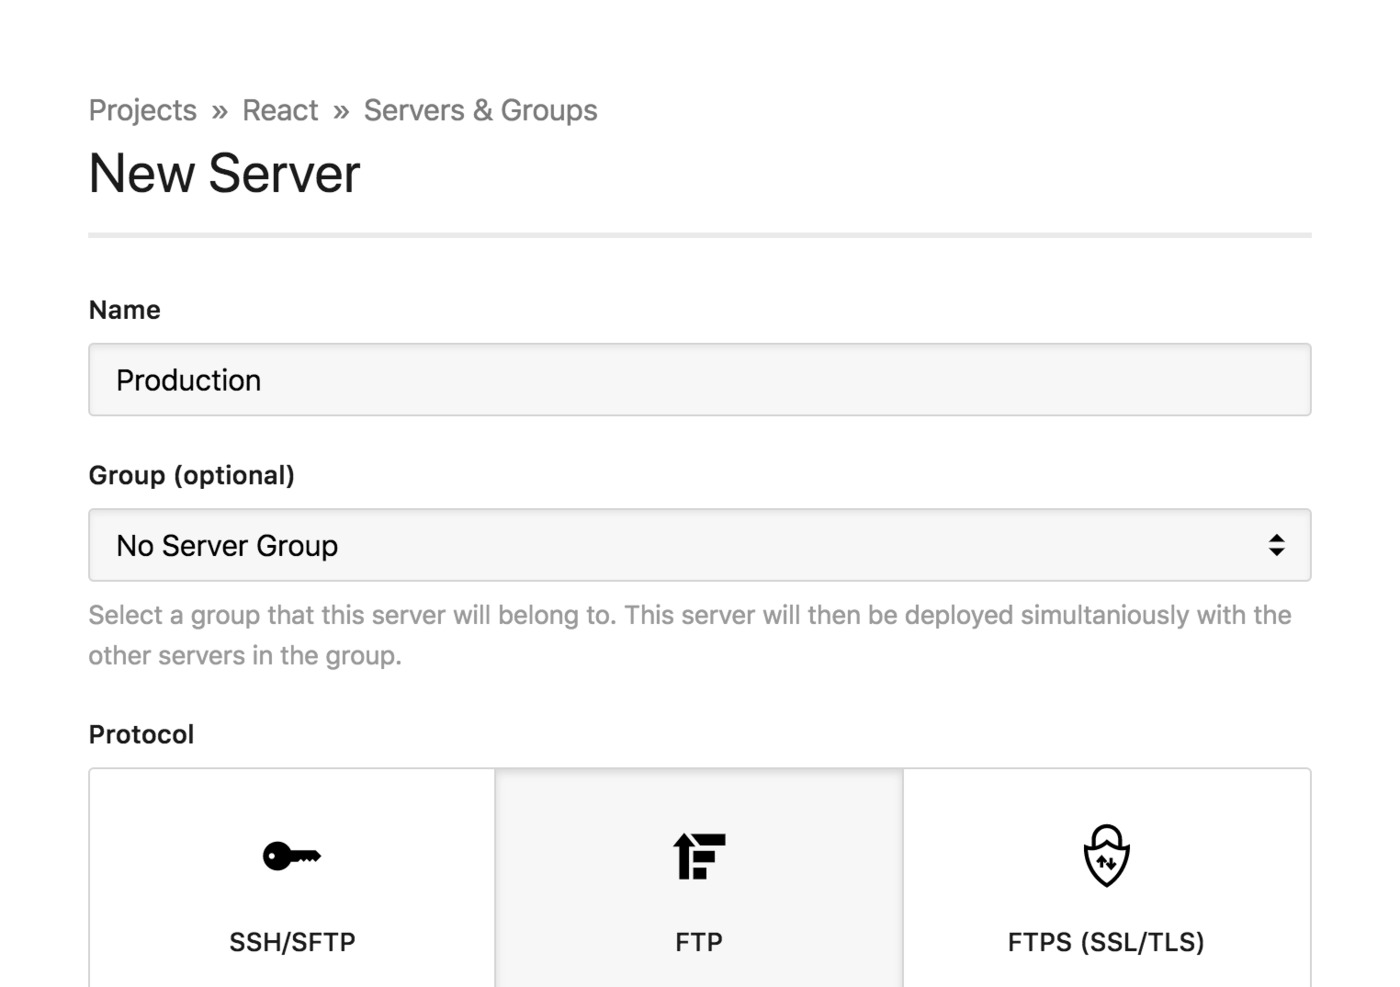
Key settings to configure:
- Hostname: Your server's IP address or domain name
- Username:
deployhq(the user you created above) - Port:
22(or your custom SSH port) - Deployment path: The absolute path to your web root, for example
/var/www/your-react-app - Deploy from branch: Set this to your production branch, typically
main
For authentication, select SSH key and copy the public key DeployHQ provides into /home/deployhq/.ssh/authorized_keys on your server.
Zero-downtime deployments: DeployHQ supports zero-downtime deployments over SSH, which atomically switches your web root to the new release after the transfer completes. See (Article: #297) for instructions on enabling this. It is strongly recommended for production deployments to avoid serving partially uploaded files.
If you need alternative connection methods, DeployHQ also supports (Article: #31), (Article: #33), (Article: #35), and (Article: #37). If you run into connection problems, (Article: #27) covers the most common troubleshooting steps.
Configure the build pipeline
DeployHQ can run your build commands on its own build servers before deploying the compiled output. This means your production server only receives the final dist folder — no Node.js runtime or build tooling required on the server itself.
Navigate to Build Pipeline in your project settings and configure the following:
Node.js version: Vite requires Node 18 or later. Select Node 18 or Node 20 from the version dropdown. Using an older Node version will cause the build to fail.
Build commands: Add the following commands in order:
npm install
npm run build
Cached files: Add node_modules/** to the cache list. DeployHQ will preserve your node_modules directory between builds, significantly reducing build times by avoiding a full dependency install on every deployment.
Deployment subdirectory: Set this to dist. This tells DeployHQ to deploy only the built output rather than your entire repository. Vite writes production builds to dist by default.
Migrating from Create React App? If your project previously used Create React App (now officially deprecated), the output directory was
buildrather thandist. When switching to Vite, update both your build tooling and the DeployHQ deployment directory to reflect this change.
Environment variables
Vite handles environment variables through .env files, exposing any variable prefixed with VITE_ to your client-side code. Variables without this prefix are available during the build but are not included in the compiled output.
A typical setup uses:
.env— defaults shared across all environments.env.production— production-specific values (committed to your repository).env.local— local overrides, excluded from version control via.gitignore
For environment-specific values that should not live in your repository — such as API endpoints that differ between staging and production — use DeployHQ's Config Files feature. This lets you define a .env file (or .env.production) in DeployHQ that gets written to your repository root before the build runs. Navigate to Config Files in your project and create an entry with the path .env.production and the environment-specific variables your build needs:
VITE_API_URL=https://api.yourproductiondomain.com
VITE_ANALYTICS_ID=UA-XXXXXXX-1
Because config files are applied before the build pipeline runs, Vite picks them up automatically during npm run build.
Configure your web server for SPA routing
React applications using React Router with BrowserRouter rely on the HTML5 History API for navigation. When a user refreshes the page or navigates directly to a route like /dashboard/settings, the server needs to serve index.html rather than returning a 404 — the React application then handles the routing in the browser.
If you are running nginx, add the following to your server block:
server {
    listen 80;
    server_name yourapp.com;
    root /var/www/your-react-app;
    index index.html;

    location / {
        try_files $uri $uri/ /index.html;
    }
}
The try_files directive tells nginx to look for a matching file or directory first, and fall back to index.html for any path it cannot resolve. This allows React Router to handle the route on the client side.
If you are using Apache, add an .htaccess file to your web root:
Options -MultiViews
RewriteEngine On
RewriteCond %{REQUEST_FILENAME} !-f
RewriteRule ^ index.html [QSA,L]
Deploy
With your project, server, and build pipeline configured, trigger your first deployment by clicking Deploy and selecting the branch and revision you want to deploy. DeployHQ will clone your repository, run the build pipeline, and transfer the dist output to your server.
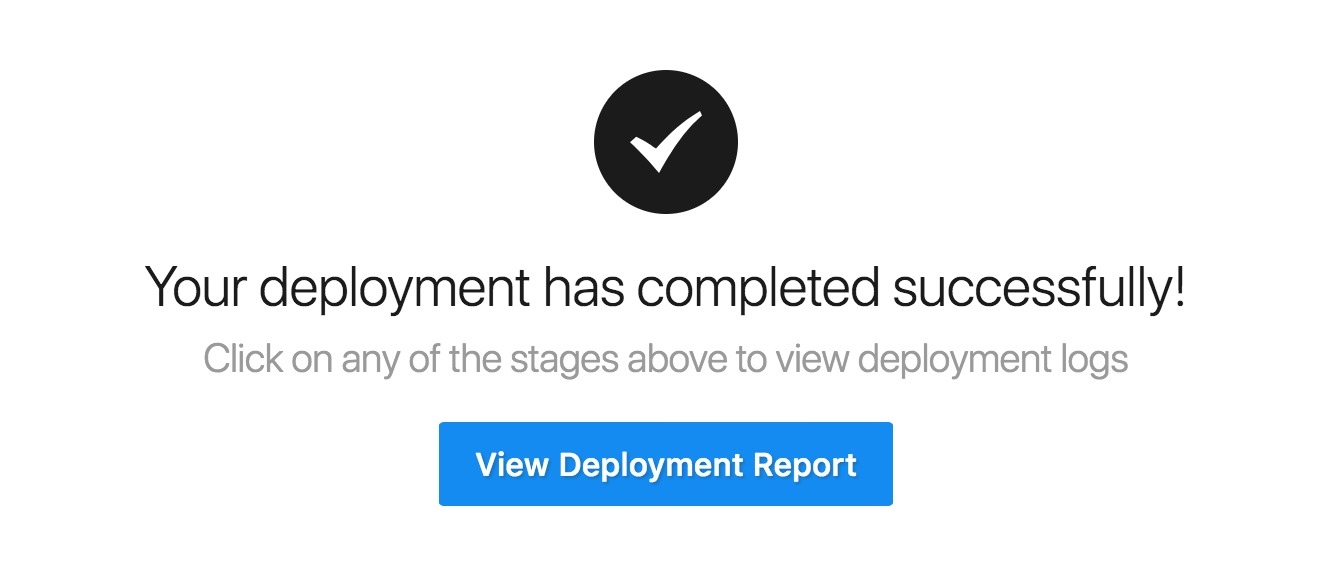
Subsequent deployments happen automatically whenever you push to your configured branch, or you can trigger them manually from the DeployHQ dashboard.
A note on Next.js and SSR
This guide covers deploying static React applications — those that compile to a folder of HTML, CSS, and JavaScript files served directly by a web server.
If you are using Next.js for server-side rendering or static site generation, the deployment model is different. Next.js applications require a Node.js server to handle SSR, API routes, and incremental static regeneration. Deploying Next.js with DeployHQ involves running npm run build followed by npm start (or using a process manager like PM2), with your server configured to proxy requests to the Node.js process.
For more deployment guides covering other frameworks and platforms, visit our guides library.