
Most modern web projects require a build step before deployment. Whether you're compiling Sass, bundling JavaScript, installing Composer dependencies, or generating a static site, these tasks need to run somewhere — and committing built artefacts to your repository creates bloated diffs, merge conflicts, and unnecessary complexity.
DeployHQ's build pipeline runs your build commands in an isolated environment after pulling your code from Git and before uploading files to your server. The result: your repository stays clean, and your server only receives the compiled output. DeployHQ also supports deployment artefacts, which let you store and manage the outputs of your build process separately from your source code.
How the build pipeline works
flowchart LR
    A[Git push] --> B[DeployHQ pulls code]
    B --> C[Build commands run]
    C --> D[Only changed files uploaded]
    D --> E[Server updated]
When a deployment is triggered, DeployHQ:
- Pulls the latest code from your repository
- Restores any cached build files from previous deployments
- Runs your build commands in sequence
- Compares the build output with the previous deployment
- Uploads only the files that changed to your server
The build environment comes with Node.js, Ruby, PHP, Python, and Go pre-installed, so most projects work without additional setup.
Setting up build commands
Navigate to your project in DeployHQ, then click Build Pipeline in the left sidebar, followed by New Command.

You can choose from preset commands for common tools (NPM, Composer, Bundler) or click Custom to write your own. Here are examples for popular stacks:
Node.js / NPM
npm ci
npm run build
PHP / Composer
composer install --no-dev --optimize-autoloader --no-interaction
Ruby / Bundler
bundle install --deployment --without development test
Python / pip
pip install -r requirements.txt
python manage.py collectstatic --noinput
Multiple steps
You can chain commands to handle complex builds. For a Laravel project with frontend assets:
composer install --no-dev --optimize-autoloader --no-interaction
npm ci
npm run build
Commands run in the order they're defined. If any command fails (returns a non-zero exit code), the deployment stops — your server isn't affected.
Using variables to customise your build pipeline
DeployHQ provides a templating system that lets you inject variables into your build commands. This is useful when you need different behaviour across environments — for example, running a production-optimised build on your live server and a debug build on staging.
Here's how you might conditionally switch build commands based on the deployment environment:
npm install
if [ "%environment%" = "production" ]; then
  npm run build:prod
else
  npm run build
fi
DeployHQ exposes a wide range of variables you can reference in build commands:
| Variable | Description |
|---|---|
%startrev% |
Start revision ref |
%endrev% |
End revision ref |
%startrevmsg% |
Start revision commit message (available on deployment finish or failure) |
%endrevmsg% |
End revision commit message (available on deployment finish or failure) |
%tag% |
Tag related to end revision (if present) |
%branch% |
The branch of the deployment |
%count% |
The number of deployments in the project |
%servers% |
Names of the servers in this deployment |
%deployer% |
User who started the deployment (if manually deployed) |
%commitrange% |
The start and end commit, separated with a hyphen |
%project% |
The name of this project in DeployHQ |
%projecturl% |
The address of this project in DeployHQ |
%projectperma% |
The permalink of this project in DeployHQ |
%deploymenturl% |
The address of this deployment in DeployHQ |
%status% |
The current status of this deployment |
These variables refer to a specific server or server group:
| Variable | Description |
|---|---|
%environment% |
Server environment (development, production etc.) |
%path% |
Server only. Base server path we're deploying to |
Configuring language versions
By default, DeployHQ uses the latest supported version of each language. If your project requires a specific version — for example, Node 20 LTS instead of the latest — you can configure this under Build Pipeline → Build Configuration.
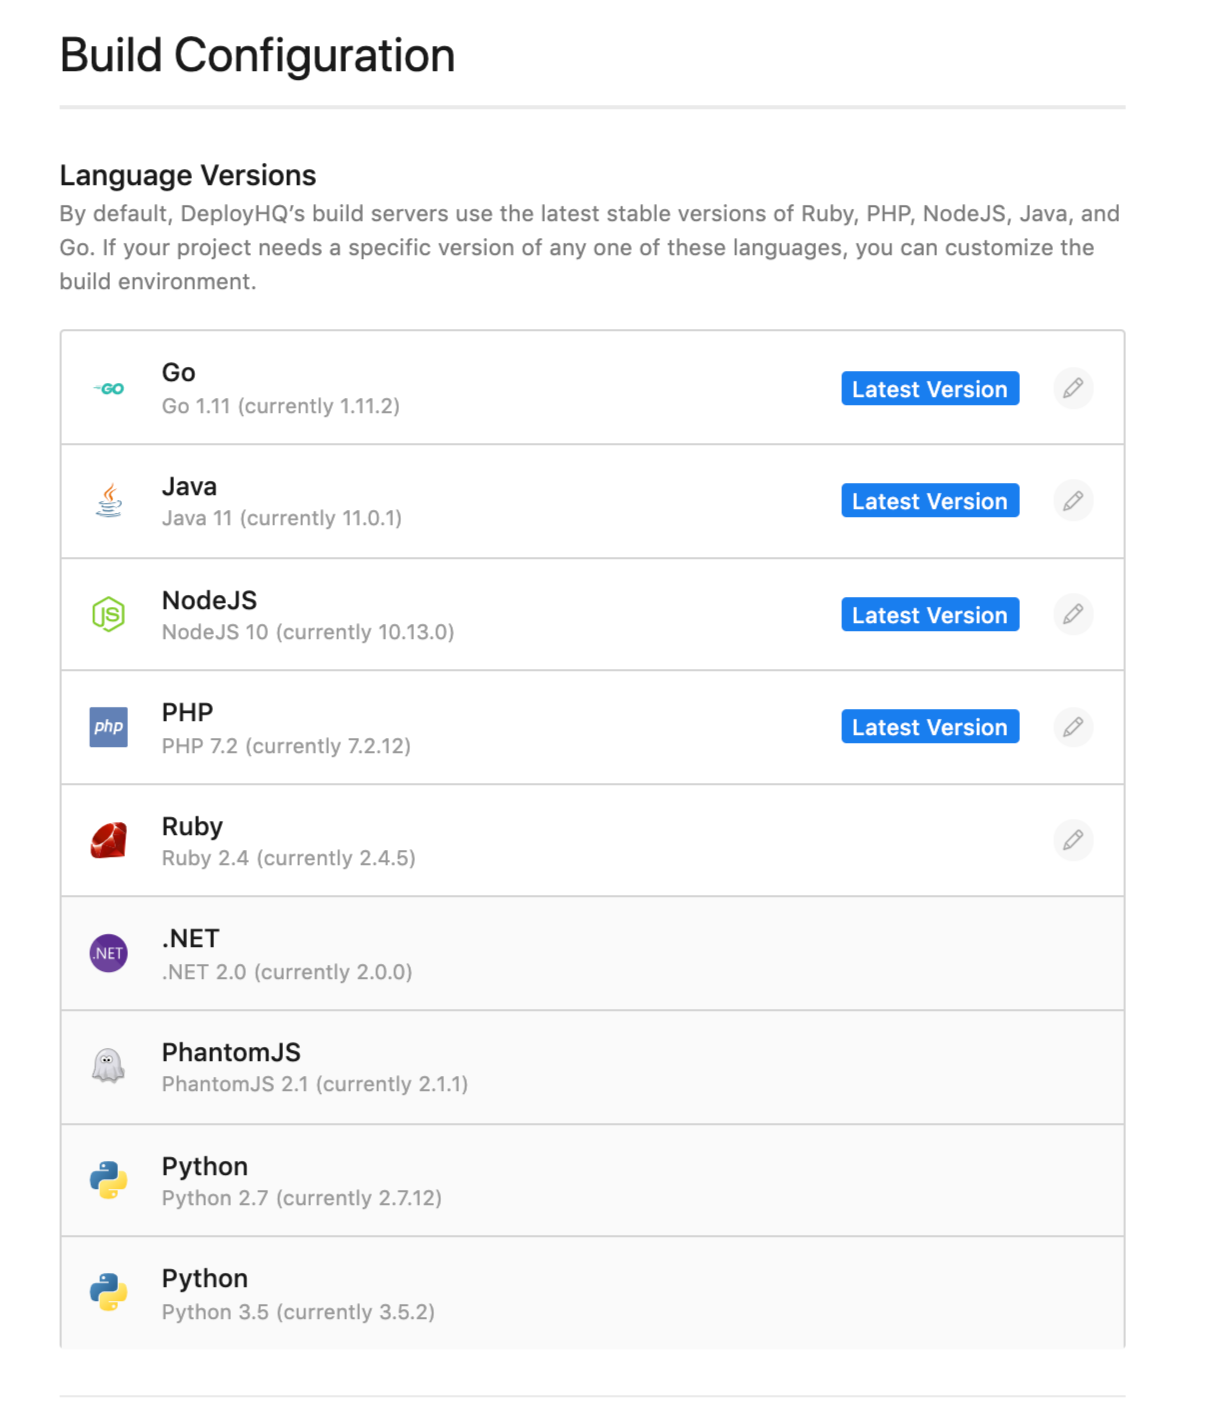
This is important when your project depends on specific APIs or has peer dependency requirements tied to a particular runtime version. For details on using specific Node.js versions, see our dedicated guide.
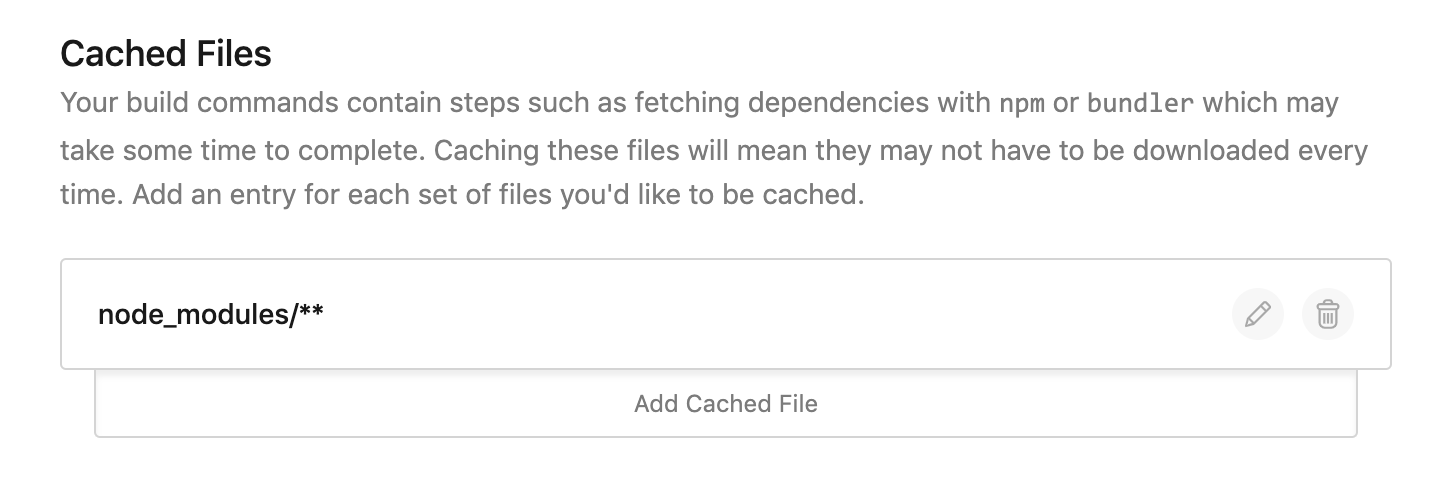
Caching build files
Fetching dependencies on every deployment wastes time. Build caching keeps a copy of your dependency directories between deployments so only new or updated packages are downloaded.
Under Build Pipeline → Build Configuration → Cached Build Files, add paths for your dependency directories:
Common cache entries by language:
| Language | Cache paths |
|---|---|
| Node.js | node_modules, node_modules/** |
| PHP | vendor, vendor/** |
| Ruby | vendor/bundle, vendor/bundle/** |
| Python | .venv, .venv/** |
Caching typically cuts build times by 50-80% after the first deployment.
Known hosts
If your build commands make SSH connections to external services — for example, pulling a private package from GitHub or Bitbucket — you may need to configure known hosts.
Under Build Pipeline → Build Configuration → Known Hosts, add the public key of the service your build connects to. To retrieve a host's public key:
ssh-keyscan -t rsa github.com 2>/dev/null | cut -d ' ' -f 2-3
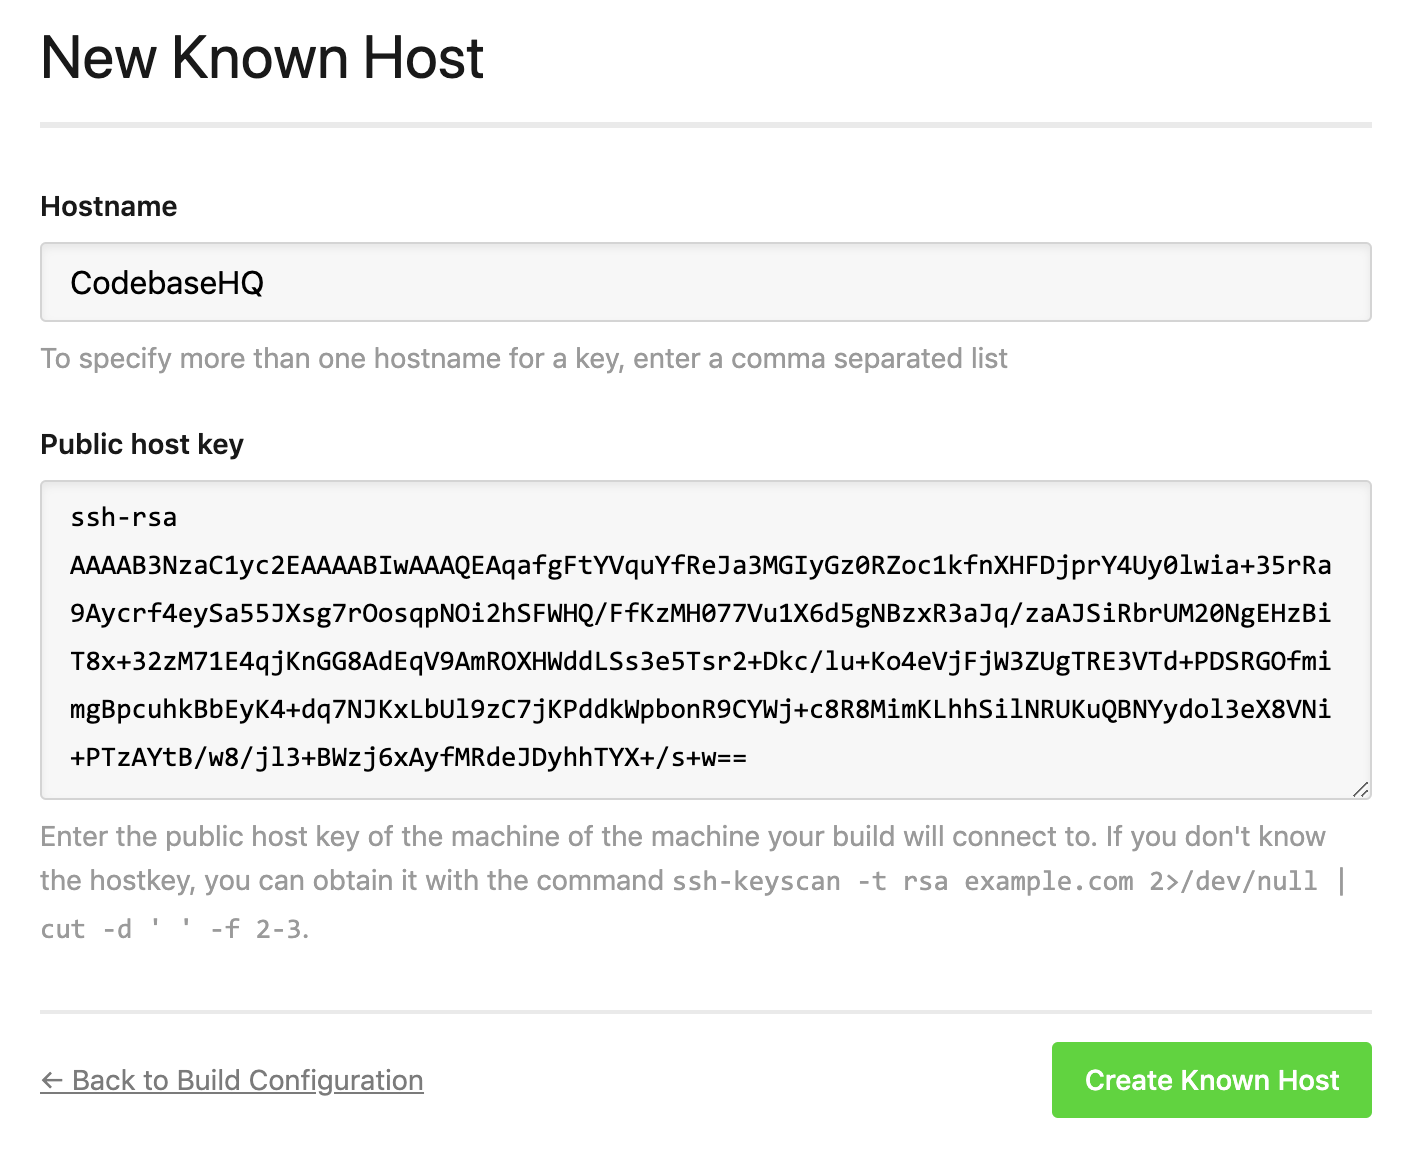
Once a known host is added, SSH connections during the build are restricted to the defined hosts only.
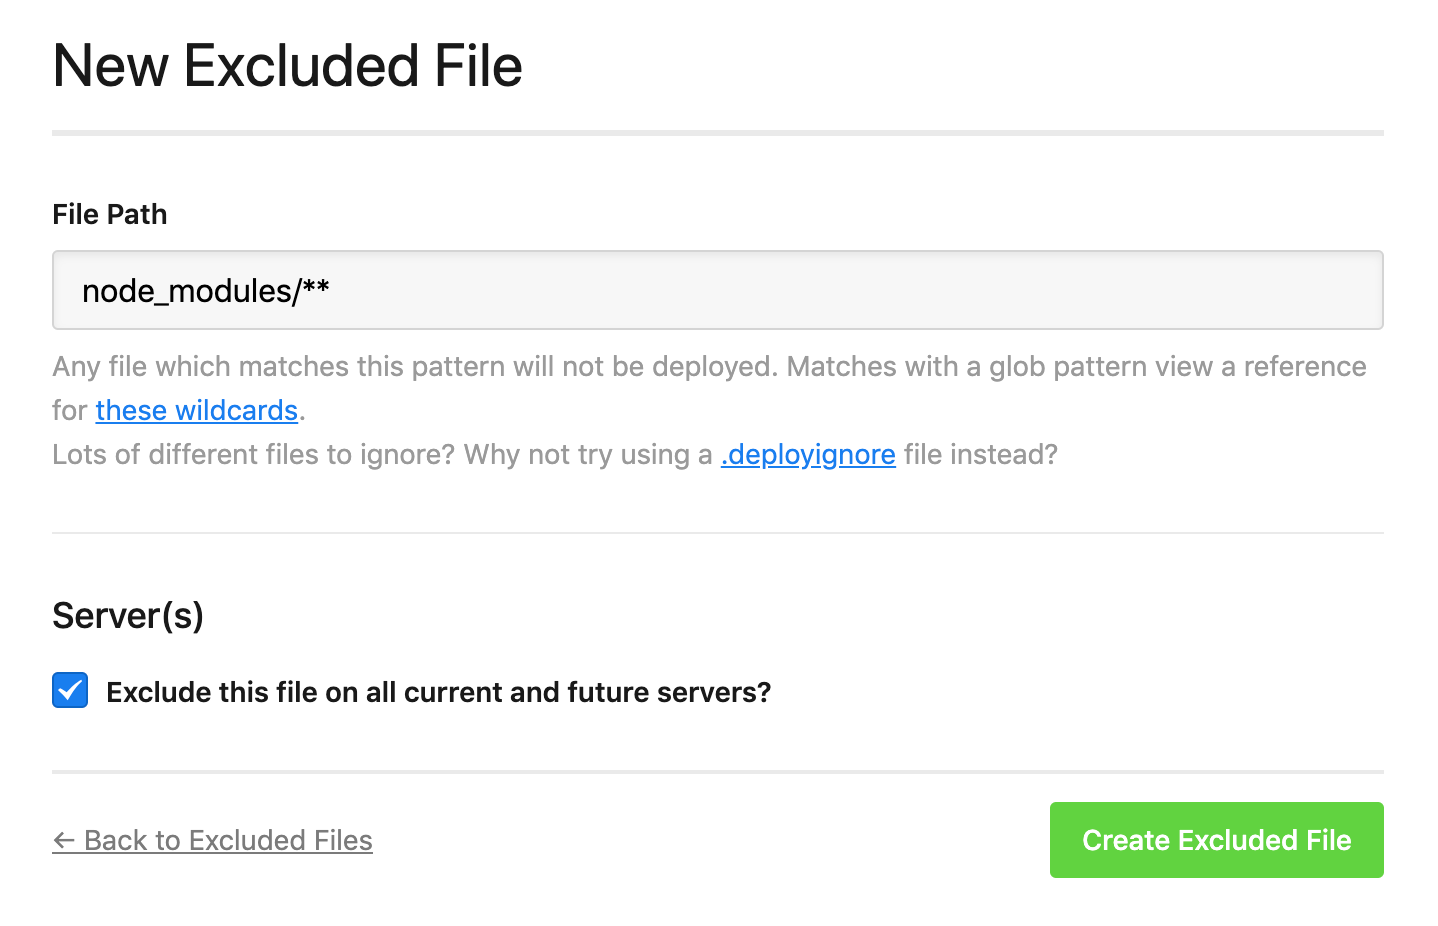
Excluding files from deployment
Build processes often generate files that are needed for compilation but shouldn't be uploaded to your server. Navigate to Settings → Excluded Files in your project to define exclusions:
Common exclusions:
| File/directory | Why exclude |
|---|---|
node_modules/ |
Build dependency, not needed on server |
src/ |
Source files if output goes to dist/ |
.git/ |
Version control metadata |
tests/ |
Test suites |
*.map |
Source maps (unless needed for debugging) |
The pattern is: cache it for the build, but exclude it from the deployment.
Combining with other DeployHQ features
The build pipeline works seamlessly with:
- Zero downtime deployments: Build output goes into a new release directory; the symlink switches only after everything is ready
- SSH commands: Run server-side commands (migrations, cache clearing, process restarts) after the build and file transfer
- Config files: Place environment-specific configuration files on the server without storing secrets in Git
- Automatic deployments: Trigger builds automatically when you push to your repository
Deployment lifecycle hooks
Beyond build commands, you can hook into the deployment lifecycle to run SSH commands on your server at key moments. DeployHQ supports three lifecycle events: before any files change, after files are uploaded but before the release goes live, and after the release is deployed.
Before Changes
This hook runs just after the build pipeline finishes but before any files are uploaded to your server. You can configure it to run on every deployment or only on the first deployment.
A common use case is server bootstrapping — preparing a fresh server with the right dependencies and firewall rules:
sudo apt-get update -y
sudo ufw default deny incoming
sudo ufw default allow outgoing
sudo ufw allow 80/tcp
sudo ufw allow 443/tcp
sudo ufw allow 22/tcp
sudo ufw enable
Set this to run only on the first deployment to avoid repeating setup steps unnecessarily.
Before Release Link
This hook executes after files have been uploaded but before the new release is made active. It works only with zero-downtime deployments and is ideal for last-minute smoke testing — verifying that critical files are present before the release goes live.
#!/bin/bash
DIST_DIR="%path%"
FILES=("index.html" "favicon.svg" "index.css")

for f in "${FILES[@]}"; do [[ -f "$DIST_DIR/$f" ]] || { echo "Missing $f"; exit 1; }; done
echo "All files are present."
If any check fails, the deployment stops and the previous release remains active.
After Changes
This hook runs after the new release is deployed and live. Use it for tasks like restarting services, clearing caches, or sending deployment notifications.
For example, sending a notification email with deployment details using the available template variables:
echo "Deployment finished" | mail -s "Deployment commit %endrevmsg% on %environment% finished" your@email.com
Practical examples
Static site (Astro)
npm ci
npx astro build
Cache: node_modules. Exclude: node_modules, src/. Deploy: contents of dist/.
PHP application (Laravel)
composer install --no-dev --optimize-autoloader --no-interaction
npm ci && npm run build
Cache: vendor, node_modules. Exclude: node_modules, tests/.
Shopify theme
npm ci
npx tailwindcss -i ./src/input.css -o ./assets/theme.css --minify
Cache: node_modules. Exclude: node_modules, src/.
For more framework-specific configurations, check our guides library.
Build minutes by plan
Build pipelines are included with all DeployHQ plans. The number of build minutes varies by plan:
| Plan | Price | Build Minutes/Month |
|---|---|---|
| Free | $0 | 30 |
| Solo | $9 | 200 |
| Pro | $19 | 800 |
| Business | $39 | 2000 |
| Enterprise | $99 | 4000 |
If your typical deployment takes around 5 minutes, you could run 160 deployments per month on the Pro plan before hitting the limit.
Ready to automate your build and deployment process? Sign up for DeployHQ and set up your build pipeline in minutes.
If you have any questions about the build pipeline, contact us at support@deployhq.com or reach out on X (Twitter).