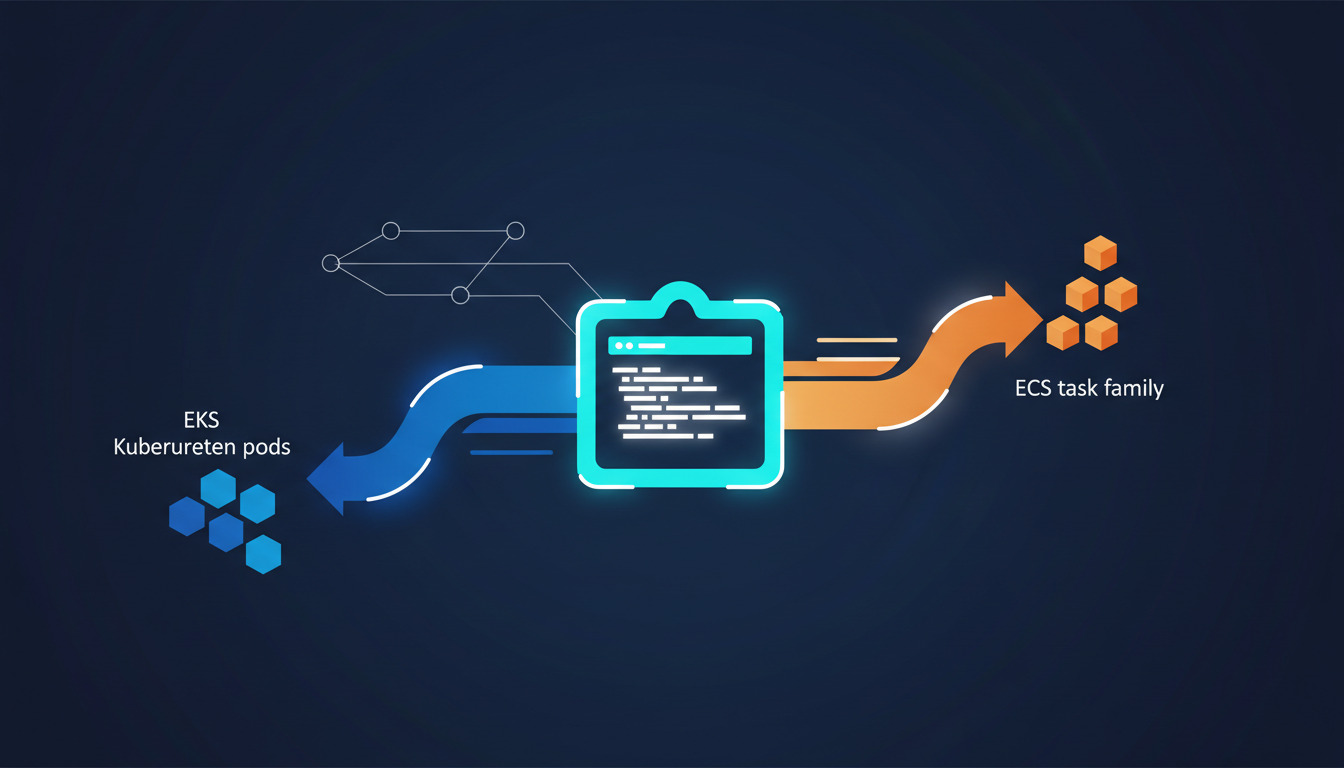
Why ECS and EKS need a different DeployHQ deployment method
Most DeployHQ projects deploy code by uploading files over SFTP or rsync to a server you own. AWS ECS and EKS don't work that way — there is nowhere to upload to. ECS expects you to push a container image to ECR and then register a new task definition. EKS expects kubectl apply against a manifest, or a kubectl rollout restart. There is no file transfer step at all.
That mismatch is what DeployHQ Custom Actions solve. A Custom Action is a server protocol type in DeployHQ — you pick Custom Action instead of SFTP, SSH, or Shell Server when you add a server. DeployHQ spins up a managed Docker container for the deployment, mounts your repository at /data, and runs the commands you configure. AWS CLI, kubectl, Terraform — anything bundled in that image can run there, with no bastion to maintain.
But there is an important constraint that trips people up, and it is worth stating before you write a single line of config: DeployHQ cannot build your container image for ECR. The Custom Action promotes an image that already exists. Getting the image into ECR is a job for your CI. The next section explains exactly why, because the workaround depends on understanding the limit.
What DeployHQ can and can't do with container images
This is the part most ECS write-ups skip, and it is the difference between a pipeline that works and an afternoon of debugging. Three DeployHQ mechanisms touch containers, and none of them will build and push to Amazon ECR:
| Mechanism | Can run docker build? |
Pushes to ECR? |
|---|---|---|
| Build pipeline | No — its sandboxed build environment provides language runtimes (Node, PHP, Python, Ruby, Go, Java, .NET); Docker is not among the supported tools | No |
| Docker Build server | Yes | No — supports Docker Hub, GCR, GHCR and ACR only |
| Custom Action | No — the container ships CLI tooling, with no Docker binary and no privileged mode for Docker-in-Docker | No |
So the ECS/ECR combination falls between all three. If you have been looking for the DeployHQ setting that builds an image and pushes it to ECR, you have not missed it — it does not exist today. Amazon ECR is simply not among the Docker Build server's registry options, and neither the build pipeline nor the Custom Action container can run docker build to work around that.
This is not the dead end it looks like. Splitting image build from image promotion is the architecture we run ourselves, and it is better than the alternative for reasons that have nothing to do with the limitation — more on that below.
The architecture that actually works
Your CI builds the image and pushes it to ECR. It then calls DeployHQ, and a Custom Action performs the ECS or EKS promotion, with real rollout waiting and one-click rollback.
flowchart LR
    A[git push] --> B[CI: GitHub Actions / CodeBuild / GitLab CI]
    B --> C[docker build + push to ECR]
    C --> D[Trigger DeployHQ deployment]
    D --> E[DeployHQ Custom Action container]
    E -->|register task def + update-service| F[ECS service API]
    E -->|kubectl set image / apply| G[EKS cluster API]
    F --> H[New tasks, drain old]
    G --> I[New pods, drain old]
The division of labour is deliberate: the CI runner does the thing CI runners are good at (building artefacts), and DeployHQ does the thing deployment platforms are good at (atomic releases, per-environment config, deployment history, one-click rollback, and notifications that are identical across every project you run).
Prerequisites
- An active DeployHQ account, and a repository connected to it (deploy from GitHub or deploy from GitLab both work here)
- A CI system that can run
docker build— GitHub Actions, AWS CodeBuild, GitLab CI, or similar - An AWS account with an ECS or EKS cluster already provisioned, and an ECR repository for the image
- Two sets of AWS credentials, scoped separately:
- For your CI:
ecr:GetAuthorizationToken,ecr:BatchCheckLayerAvailability,ecr:InitiateLayerUpload,ecr:UploadLayerPart,ecr:CompleteLayerUpload,ecr:PutImage - For the DeployHQ Custom Action:
ecs:UpdateService,ecs:DescribeServices,ecs:RegisterTaskDefinition,ecs:DescribeTaskDefinition, and for EKS,eks:DescribeCluster
- For your CI:
- For EKS: a container image bundling the AWS CLI and a
kubectlmatching your cluster's minor version
Splitting the credentials matters. The Custom Action never needs to write to your registry, so don't give it push rights. For the wider pattern, see our guide on secrets management for modern deployments.
You do not need an EC2 bastion or a self-hosted runner. The promotion runs in a fresh DeployHQ-managed container, then disappears.
Step 1: Build and push the image to ECR in your CI
Tag with the commit SHA, never :latest. If you only ever push :latest you have thrown away your rollback target — a classic mistake that turns a 30-second incident into a 30-minute one. Our writeup on Dockerizing your application for DeployHQ deployments covers tag hygiene in detail.
A GitHub Actions job that does the build and push:
- name: Configure AWS credentials
  uses: aws-actions/configure-aws-credentials@v4
  with:
    role-to-assume: arn:aws:iam::123456789012:role/ci-ecr-push
    aws-region: eu-west-1

- name: Log in to Amazon ECR
  id: ecr
  uses: aws-actions/amazon-ecr-login@v2

- name: Build and push
  env:
    REGISTRY: ${{ steps.ecr.outputs.registry }}
  run: |
    IMAGE=$REGISTRY/myapp:${{ github.sha }}
    docker build -t "$IMAGE" .
    docker push "$IMAGE"
Prefer OIDC role assumption over long-lived access keys where your CI supports it — GitHub Actions and CodeBuild both do. It removes a static secret from the pipeline entirely.
Step 2: Trigger the DeployHQ deployment from CI
Once the image is in ECR, hand off. DeployHQ publishes an official GitHub Action that blocks until the deployment reaches a terminal status, so a failed release fails your workflow instead of silently passing:
- name: Deploy via DeployHQ
  uses: deployhq/deploy-action@<pinned-commit-sha>
  with:
    account: your-account
    project: myapp
    server: production-ecs
    revision: ${{ github.sha }}
    api-key: ${{ secrets.DEPLOYHQ_API_KEY }}
Pin the action to an immutable commit SHA rather than a mutable tag — a moving tag is a supply-chain path straight to your deployment credentials. If you are on CodeBuild, GitLab CI, or anything else, call the DeployHQ deployments API directly instead; the handoff is the same idea. We wrote up the full reasoning behind this split in how we deploy DeployHQ.com with GitHub Actions, Docker, and the DeployHQ Action, including the staleness guard that stops an out-of-order build rolling an environment backwards.
Step 3: Add a Custom Action server in DeployHQ
In your project, go to Servers > Add New Server and pick Custom Action. You'll be asked for:
- Name: e.g.
production-ecsorstaging-eks— this is the value you pass asserverin the trigger above - Container image: for ECS, an image with AWS CLI v2 is enough (
amazon/aws-cli:latest, or the curated AWS CLI template). For EKS, use an image with both the AWS CLI and a matchingkubectl - Environment: the deployment environment this server belongs to
Your repository is mounted at /data, which is also the working directory.
The one-command-per-line rule
This is the second thing that catches people, and it is not obvious from the UI. The Custom Action Commands box runs one command per line, sequentially — it is not a shell script. Paste a multi-line bash script with #!/bin/bash, set -euo pipefail, backslash line continuations, or a multi-line jq expression and it fails with syntax error: unexpected end of file, because each line is parsed as a complete command on its own.
You could paste commands individually, but for anything involving variables or command substitution that is fragile. The robust pattern is to commit the deployment script to your repository and invoke it as a single command from /data:
chmod +x /data/deploy/ecs-deploy.sh
/data/deploy/ecs-deploy.sh
Two lines, each a complete command. All the multi-line logic — variables, jq pipelines, error handling — lives in a file that is version-controlled, reviewable in a pull request, and testable locally. That is strictly better than a textarea full of shell.
Step 4: The ECS promotion script
Commit this as deploy/ecs-deploy.sh. It reads the configuration variables you'll set in Step 6.
#!/bin/bash
set -euo pipefail

CLUSTER=production
SERVICE=myapp
REGION="${AWS_REGION}"

# The commit being deployed, supplied by DeployHQ. Fail loudly if it is unset
# rather than silently promoting a ":" tag that does not exist.
REVISION="${DEPLOYHQ_REVISION:?revision not set - see the note below this script}"
IMAGE="${AWS_ACCOUNT_ID}.dkr.ecr.${AWS_REGION}.amazonaws.com/myapp:${REVISION}"

# Register a new task definition revision pointing at this commit's image
NEW_TASK_DEF=$(aws ecs describe-task-definition \
  --task-definition myapp \
  --region "$REGION" \
  --query 'taskDefinition' \
  | jq --arg img "$IMAGE" '.containerDefinitions[0].image = $img
      | del(.taskDefinitionArn, .revision, .status,
            .requiresAttributes, .compatibilities,
            .registeredAt, .registeredBy)')

NEW_REVISION=$(aws ecs register-task-definition \
  --cli-input-json "$NEW_TASK_DEF" \
  --region "$REGION" \
  --query 'taskDefinition.taskDefinitionArn' --output text)

aws ecs update-service \
  --cluster "$CLUSTER" \
  --service "$SERVICE" \
  --task-definition "$NEW_REVISION" \
  --region "$REGION"

# Wait until the rollout is healthy. This is the line most guides skip.
aws ecs wait services-stable \
  --cluster "$CLUSTER" \
  --services "$SERVICE" \
  --region "$REGION"

echo "ECS deployment complete: $SERVICE on revision $NEW_REVISION"
Two things to call out.
On the revision variable. DeployHQ exposes the commit being deployed to command contexts as $DEPLOYHQ_REVISION; the template-variable form documented for projects is %endrev% (with %shortendrev% for the 8-character version). Which one interpolates depends on where the value is being read, so confirm it resolves on a staging deployment before you point this at production — the :? guard above turns a wrong guess into an immediate, obvious failure instead of a push against a tag that was never built.
The aws ecs wait services-stable call is what turns this from fire-and-forget into a real deployment. Without it, DeployHQ reports success the moment ECS accepts the update — not when the new tasks are actually serving traffic. The wait blocks until the desired task count equals the running count and the deployment is PRIMARY. If the new task definition fails its health check, the wait exits non-zero and the deployment fails loudly. That's what you want.
Registering a new task definition revision per deploy — rather than --force-new-deployment against :latest — gives you an explicit task definition history to roll back to, separate from the image registry. It composes naturally with zero-downtime deployments: ECS drains old tasks only once the new ones pass health checks.
For the full AWS CLI v2 patterns used here — ECR auth, rolling deploys with services-stable waits, SSM parameter fetch, log tailing — see our AWS CLI cheatsheet.
Step 5: The EKS promotion script
Commit as deploy/eks-deploy.sh, invoked the same one-command-per-line way.
#!/bin/bash
set -euo pipefail

CLUSTER=production
NAMESPACE=production
DEPLOYMENT=myapp
REGION="${AWS_REGION}"
REVISION="${DEPLOYHQ_REVISION:?revision not set - see the note under the ECS script}"
IMAGE="${AWS_ACCOUNT_ID}.dkr.ecr.${AWS_REGION}.amazonaws.com/myapp:${REVISION}"

# Fetch a kubeconfig for the cluster
aws eks update-kubeconfig --name "$CLUSTER" --region "$REGION"

# GitOps-style: apply manifests straight from the repo at /data
kubectl apply -f /data/k8s/ -n "$NAMESPACE"

kubectl set image "deployment/${DEPLOYMENT}" \
  "${DEPLOYMENT}=${IMAGE}" \
  -n "${NAMESPACE}"

# Wait for the rollout — the Kubernetes equivalent of services-stable
kubectl rollout status "deployment/${DEPLOYMENT}" \
  -n "${NAMESPACE}" \
  --timeout=10m

echo "EKS rollout complete: ${DEPLOYMENT}"
kubectl rollout status blocks until the new ReplicaSet is fully ready and exits non-zero if the rollout fails (ImagePullBackOff, readiness probe failures), which propagates back to DeployHQ as a failed deployment.
If your manifests live in the repo — a GitOps-style workflow — the /data mount means kubectl apply -f /data/k8s/ is the entire integration, with nothing to copy first. That is the main practical advantage of Custom Actions over a self-hosted runner. For the commands above, see our kubectl cheatsheet.
Step 6: Set configuration variables for the Custom Action
Under Servers > [Your Custom Action] > Configuration Variables, add:
AWS_ACCESS_KEY_ID       <protected>
AWS_SECRET_ACCESS_KEY   <protected>
AWS_REGION              eu-west-1
AWS_ACCOUNT_ID          123456789012
Mark the secret key as protected so it never appears in deployment logs. Remember these are the promotion credentials from the prerequisites — no ECR write permissions needed. For EKS the kubeconfig is generated on the fly by aws eks update-kubeconfig, so you don't need to ship one.
Step 7: Roll back when things go wrong
Because the image is already in ECR and the task definition history is intact, rollback never needs a rebuild.
ECS — re-deploy the previous task definition revision:
aws ecs update-service \
  --cluster production \
  --service myapp \
  --task-definition myapp:42
aws ecs wait services-stable --cluster production --services myapp
EKS — use Kubernetes' built-in rollout history:
kubectl rollout undo deployment/myapp -n production
kubectl rollout status deployment/myapp -n production
The DeployHQ side is just another Custom Action: create a Rollback
server that runs the relevant script from /data, and trigger it on demand from the deployments page. That gives you a consistent rollback story across containerised and file-based projects in the same account. For deeper design thinking, see our writeup on automated rollback strategies when your deployment goes sideways.
Failure modes nobody warns you about
- Looking for ECR in the Docker Build server's registry list. It isn't there — Docker Hub, GCR, GHCR and ACR only. Build in CI instead, as above. This is the single most common way this setup stalls.
- Pasting a bash script into the Custom Action Commands box. One command per line, so
syntax error: unexpected end of fileis the symptom. Move the logic into a repo script and call it. - Expecting
dockerinside a Custom Action container.docker -vreturnscommand not found(exit 127), and there is no privileged mode to run Docker-in-Docker. - ECR auth tokens expire after 12 hours. If your CI caches a
docker login, the next build fails withdenied: Your authorization token has expired. Re-authenticate at the start of every run. - Task definitions can't reference images that don't exist. Push first, register the task definition second, update the service third. Racing this causes
CannotPullContainerError. kubectl rollout statushangs for the full timeout if a readiness probe is misconfigured. A pod that starts but never goes Ready blocks the rollout. SetprogressDeadlineSeconds: 300on the deployment spec to fail fast.- EKS auth fails after IAM role rotation. The
aws-authConfigMap caches role mappings. Rotate the Custom Action's IAM credentials and you must update the ConfigMap too. Symptom:error: You must be logged in to the server (Unauthorized)from a previously-working deployment. - Private VPCs with no public AWS API endpoints. If you've locked the cluster to VPC endpoints only, the Custom Action container can't reach the control plane. Use a Shell Server inside the VPC instead.
When to use a Shell Server instead
A Shell Server is the right answer in two situations.
The first is a private VPC with no public AWS API access — an EKS cluster whose control plane is reachable only from inside the VPC. Provision a small EC2 instance in the VPC, install the AWS CLI and kubectl, and register it as a Shell Server. One important difference from Custom Actions: a Shell Server deployment does not upload your repository — only config files are transferred. So the promotion script and any manifests have to already be on that host, which in practice means having it git clone the repo once and git pull at the start of each deployment. Custom Actions mount the repo at /data for you; Shell Servers do not. This also works behind corporate firewalls — see deploying to a private network behind a firewall for the network agent setup.
The second is a long-lived agent that owns state between runs — scheduled jobs, cached kubeconfigs, a Terraform state lock helper. The trade-off is that you now own a server: patching, hardening, monitoring and IAM rotation are yours. For most ECS and EKS workloads that's overhead you don't need.
Worth noting: a Shell Server inside your VPC can run docker build and push to ECR, since it's your host and your Docker daemon. If you already run one, that collapses the build and promote steps back into DeployHQ — at the cost of maintaining the instance, and remembering that it has to fetch the source itself.
Why splitting the build from the deploy is the right shape anyway
It would be easy to read the ECR limitation as a gap to work around. In practice the split is what we run in production ourselves, for three reasons that hold regardless:
- Rollback never rebuilds. The image is already in ECR, tagged by commit SHA. Promotion and rollback are both a single API call against an artefact that already exists — no waiting on a build to recover from an incident.
- One audit log across every project. ECS, EKS, plain VPS, shared hosting, static sites — all in the same deployment history with the same rollback UX and the same Slack, email and webhook notifications. New engineers don't learn five CI flavours.
- Least privilege falls out naturally. Build credentials write to the registry; deploy credentials mutate the cluster. Neither can do the other's job.
For the wider picture, see our step-by-step guide to building a CI/CD pipeline from scratch with DeployHQ. Container-image hygiene matters here too — 12-factor app methodology with DeployHQ covers config and process patterns that translate directly to ECS task definitions and EKS pod specs. And for background on rolling, blue/green and canary deploys, zero-downtime deployment strategies for modern applications is the natural follow-up.
Wrapping up
The pattern is always the same: your CI produces an immutable artefact in ECR, and a DeployHQ Custom Action promotes it. Add aws ecs wait services-stable or kubectl rollout status so failed rollouts surface as failed deployments, keep the promotion logic in a version-controlled script rather than the Commands box, and tag every image with the commit SHA so rollback is one call.
DeployHQ won't build your ECR image today — and now you know exactly where that boundary sits and how to work with it, instead of discovering it halfway through a migration.
If you're new to DeployHQ, sign up for a free trial and wire this up against a sample ECS service first — the cheapest way to validate the workflow before pointing it at production. For container fundamentals, our explainer on what Docker is and how images, registries, and containers fit together is worth ten minutes.
Questions or hit a snag wiring up the Custom Action? Email us at support@deployhq.com or ping @deployhq — we're happy to help.